Showing posts with label Latest Technology. Show all posts

Saturday, May 26, 2012

What is VoIP? How does it work?

3.1 What is VoIP?

VoIP stands for 'V'oice 'o'ver 'I'nternet 'P'rotocol. As the term says VoIP tries to let go voice (mainly human) through IP packets and, in definitive through Internet. VoIP can use accelerating hardware to achieve this purpose and can also be used in a PC environment.

3.2 How does it work?

Many years ago we discovered that sending a signal to a remote destination could have be done also in a digital fashion: before sending it we have to digitalize it with an ADC (analog to digital converter), transmit it, and at the end transform it again in analog format with DAC (digital to analog converter) to use it.
VoIP works like that, digitalizing voice in data packets, sending them and reconverting them in voice at destination.
Digital format can be better controlled: we can compress it, route it, convert it to a new better format, and so on; also we saw that digital signal is more noise tolerant than the analog one (see GSM vs TACS).
TCP/IP networks are made of IP packets containing a header (to control communication) and a payload to transport data: VoIP use it to go across the network and come to destination.
Voice (source) - - ADC - - - - Internet - - - DAC - - Voice (dest)

3.3 What is the advantages using VoIP rather PSTN?

When you are using PSTN line, you typically pay for time used to a PSTN line manager company: more time you stay at phone and more you'll pay. In addition you couldn't talk with other that one person at a time.
In opposite with VoIP mechanism you can talk all the time with every person you want (the needed is that other person is also connected to Internet at the same time), as far as you want (money independent) and, in addition, you can talk with many people at the same time.
If you're still not persuaded you can consider that, at the same time, you can exchange data with people are you talking with, sending images, graphs and videos.

3.4 Then, why everybody doesn't use it yet?

Unfortunately we have to report some problem with the integration between VoIP architecture and Internet. As you can easy imagine, voice data communication must be a real time stream (you couldn't speak, wait for many seconds, then hear other side answering): this is in contrast with the Internet heterogeneous architecture that can be made of many routers (machines that route packets), about 20-30 or more and can have a very high round trip time (RTT), so we need to modify something to get it properly working.

Sunday, May 13, 2012

How to zoom in on your iPhone’s entire display?


You probably know how to zoom in on a web page in the iPhone’s Safari browser by “pinching” the page with your fingertips, but what if you want to magnify the entire iPhone screen, including even the digital clock and battery icon at the top of the display?

The trick, as it turns out, is a three-finger tap—but you’ll have to tweak a key iPhone setting first.

Just change this one setting on your iPhone to magnify its screen with a three-finger double-tap.

Ready to give it a try? Here we go…
  1. From your iPhone home screen, tap Settings, General, Accessibility, Zoom, then switch Zoom to “On.”
  2. Now double-tap the screen with three fingers at once, and well … zoom!
  3. Want to pan around your zoomed-in iPhone display? Just swipe around as your normally would, expect using three fingertips at once rather than just one.
  4. You can also adjust the magnification level by double-tapping and holding with three fingers (it’s a “tap” and a “hold,” not a double-tap and then a hold), then dragging your fingertips up (to increase the zoom level) or down (to decrease the magnification).
  5. Had enough? Double-tap the screen with three fingers again to make it jump back to the normal view.

Note: This tip also works on the iPad and the iPod Touch.

Saturday, May 12, 2012

What is Google Cloud Print?

Google cloud print is based on the idea that printing can be more intuitive, available & useful. Cloud Using Google Print can make your printers are available from any web enabled Google Print cloud, desktop or mobile applications. To start printing by Google Cloud Print, connect a printer to your account. Google is compatible with printers prepared & classic clouds.


What is Google Cloud Print?

Replicate complex printing architectures of traditional PC systems operating in these new class of devices is not desirable & often not feasible. Nobody in the printing ecosystem – users, developers, manufacturers of printing – wishes to extend the GCP eliminates the necessity for drivers & provides all the printing functions to a new generation of mobile applications & web-based “driver’s disorder .. ”

There are significant trends in computing today, the shift towards web / cloud-based applications & the proliferation of networked mobile devices. As these web applications & mobile devices have become more capable, users expect the same capabilities they have on their PCs, & the impression is at the top of the list.


This is accomplished by using a print of clouds. Applications no longer depend on the local operating technique (& drivers) to print. In lieu, as shown in the diagram below, the applications (whether a native desktop / mobile app or web application) the use of PCBs to send & manage print jobs. GCP is responsible for sending the print job to the appropriate printer, with particular options chosen user, & provide the job status of the application.

google cloud print


Google Cloud Print Components

Applications

Any application can use Google Print Cloud, including web applications (like G
mail & sure third-party applications) & native applications (eg, a desktop word processor or a tool Android / IOS). These applications called Google Print Cloud API. You can use these APIs to collect the knowledge necessary to demonstrate their own user interface for custom printing options or basically use the common print dialog box that offers Google Cloud Print (see “User Interface” later in this page). There’s also APIs to query the status of the print job. Cloud Google Print is now integrated with Gmail for mobile rings & Google Docs & will integrate with more applications in the approaching months. Third Party Application developers can use Google Print Cloud on your web, desktop & mobile applications.


Google Cloud Print Service

Cloud Google Print is a web service offered by Google. Users associate printers with your Google Account. The printers are treated the same way that the documents are in Google Docs: it’s easy to share printers, along with co-workers, friends and family anywhere in the world. No need for complex network configurations for the print job sharing! In addition to associating printers with a Google Account user, GCP also stores the capabilities of each printer model to the appropriate print options can be shown to the user before sending a print job. Once the service receives a print job is sent to the printer. The service also receives regular updates on the status of the print job from the printer and makes this state can be obtained from the application.

Printers

Print Cloud Google removes the ambiguity between the two types of printers: printers ready and not cloud the cloud.

Cloud Ready Printers

Printer Prepared cloud are a new generation of printers with native support for connecting to the cloud of printing services. A cloud prepared printer does not need a PC connection or for any print driver. The printer is basically registered in or more services from the cloud of printing & print jobs waiting. They think that the impression of clouds has giant benefits for finish users & industry, & will increasingly come to be expected of users, given the speedy transition to cloud-based applications & knowledge warehousing & mobile computing. They also think that the only way that the benefits of cloud printing can be done is if the protocols are open, apply freely &, when feasible, based on industry standards. They hope you print multiple cloud services, & users ought to have an option in which the services they use, & printers that are connected to each. HP has launched its line of prepared ePrint clouds that can connect to Google Cloud Print, & more prepared cloud models will be announced in coming months.

Non-cloud Printers

Most printers obtainable today fall in to this section. This section includes printers connected directly to the PC (eg by a USB cable) & network printers (Ethernet or WiFi). This section also includes the recent crop of “connected to the Web” printers that offer users access to definite web services (such as maps & film tickets) directly from the LCD screen on the printer. While these are “connected site,” are not prepared printers clouds as described above, because they don’t have the ability to communicate directly with a print of clouds in search of print jobs.

They wish users to print to printers do not cloud through Google Print Cloud. This is accomplished by using a connector, a small piece of program that runs on a PC where the printer is installed. The connector is responsible for registering the Google Cloud Print printer & wait for print jobs from the service. When a jobarrives, the connector is sent to the printer using the operating process program of the PC original printer &job status sent back to the service.

So far, they have developed a connector for Mac & Windows, & are developing for Linux. To help users avoid the trouble of installing other program on their PCs, these connectors are shipped with Google Chrome. By basically installing Google Chrome on your PC & activate the function (which is disabled by default), users can print by Google Cloud Print clouds to lack of printers. obvious disadvantage of this approach is that the PC must be turned on & connected to the Web for print jobs to reach the connection (& therefore the printer). The current requirement that encourages enthusiasm for working with industry to build native support for printing services of clouds in the next generation of printers. They are also waiting to see clever people in the community to build small hardware connectors factors (such as routers with print server capabilities) to permit users to get all the benefits of connection without leaving your PC on.


Monday, May 7, 2012

What is “Google Play”? - A new home for Android apps, music, videos, and books


So much for the Android Market. In its place: “Google Play,” Google’s new digital hub for Android apps, games, and media.

In a blog post Tuesday, Google said it was consolidating the Android Market, Google Music, and Google eBookstore sites into Google Play to reduce the “hassle” of finding and organizing apps, tracks, videos and books for your various Android devices.

You can still browse for apps just as before, with the main app product pages (like this one) serving up product descriptions, screenshots, user reviews, and buttons for buying and/or installing a given app to your Android device.That’s the theory, anyway. In practice, Google Play (which you can check out right here) looks an awful lot like the old Android Market.

Up at the top of the Google Play page, just above a rotating carousel of promos, you’ll find tabs for “My Music” (the new home of Google Music), “My Books” (which replaces the Google eBookstore), and “My Movies” (for video rentals and purchases).

OK, so what happens to your old apps from the gone-but-not-forgotten Android Market, or your Google Music tune collection? Don’t worry—they’re still there, just where you left them. Indeed, the books and albums I bought from Google Music and the eBookstore are present and accounted for, except now they’re sitting under a “Google Play” banner.

What will be changing, though, is the Android Market app on your Android smartphone or Tablet. Google says it’ll be upgrading the app to the “Google Play Store” app in “the coming days.”

Google is also promoting the Google Play launch with daily discounts during the next week;check out this blog post for more details.

So, what do you think: will putting all of Google’s Android wares under a single “Google Play” roof make it easier to shop for apps, music, videos and books? Or will you miss the Android Market? Let me know what you think!

Sunday, April 29, 2012

How to restore an iCloud backup of your old iPad to your new iPad? - Easy Way


So, you’ve got the latest and greatest iPad, and you want to transfer everything on your old iPad—including your apps, contacts, calendars, music, and videos—to your new one. What’s the best way to do it?

My suggestion: try Apple’s iCloud Backup utility, which makes nightly copies of your iPad’s settings, messages, camera roll, and even its wallpaper, and wirelessly saves them to a giant iCloud server bank.

iCloud Backup is an essential tool for preserving your iPad, iPhone, or iPod Touch data in case something disastrous befalls your precious iDevice, but it also makes for a handy, relatively painless way to move from (for example) an old iPad to a new one.

I’ve already demonstrated how to restore an iCloud backup to an iPhone, but the arrival of my iPad 3—er, the “new” iPad—presents a nice opportunity to document how to use iCloud Backup to transfer settings and data from an old iPad to a brand-spanking new one.

So, ready to get started?

Tap "Back Up Now" to create a fresh iCloud backup of your old iPad.

1. The first step, of course, is making sure you have a recent iCloud backup of your old iPad. (Don’t have an iCloud backup at all yet? Visit iCloud.com, set up a free account, sign in on your iPad, then tap Settings, iCloud, Storage & Backup to get started.)

From your iPad home screen, tap Settings, iCloud, then Storage & Backup. At the bottom of the page, you’ll see a date for your last iCloud Backup, and just above it, a button labeled “Back Up Now.” Unless your latest iCloud backup for your iPad is less than an hour old or so, you should probably go ahead and tap “Back Up Now” to get a fresh backup before moving ahead.

2. Do you have any videos or music on your iPad that you didn’t get from the iTunes Store? Or how about photo albums from iPhoto? If so, they’re probably sitting in iTunes (or iPhoto, in the case of photos) on your PC or Mac—and if that’s the case, I recommend you sync your iPad with iTunes one last time, either via USB or Wi-Fi. (iTunes Match users will be able to download all their music from iCloud.)

3. All set? Now, pull your new iPad out of its box, slide the “slide to set up” slider, pick a language (English, Spanish, French, etc.), a country, and decide whether to enable the iPad’s “location services” (which let your various apps pinpoint your location).

4. Connect to a Wi-Fi network (probably your own), which you’ll need to do if you want to transfer the iCloud Backup of your old iPad to your new one.

5. Next, you’ll get three choices: Set Up as New iPad, Restore from iCloud Backup, and Restore from iTunes Backup. Since we’ve got our iPad backup in iCloud, we’re going to go ahead and select Restore from iCloud Backup, then click Next.

Just tap the most recent iCloud backup of your old iPad, tap Restore, and you're on your way.

6. On the following screen, you’ll enter your Apple ID and password, followed by a lengthy terms-of-service agreement. Once you’ve read it (or skimmed it, anyway), tap Agree.

7. Now comes the moment of truth: a screen that lists your latest iPad backups in iCloud. Pick the most recent one, then tap the blue Restore button.

8. Up next: a progress bar that shows you how long it’ll take for iCloud to restore your old iPad settings. If you’re lucky, it’ll only take a few minutes, and after another quick loading screen, you’ll jump to the iPad home page—or rather, your old iPad home page, just like you left it (folders and all).

But wait—you’re not done yet.

It could take hours for all your old iPad app to download, but at least you can use your new iPad while you wait.

9. Now comes the boring part:waiting for all your apps and iTunes media (music, videos, e-books, and the like) to download and install themselves on your new iPad. Depending on how many apps and other downloadable goodies you had on your old iPad, you could be in for a long wait. The good news, though, is that you’ll be able to use your shiny new iPad (including Safari, Mail, Music, and other core iPad apps) while you wait for your purchased apps and media to arrive.

10. Before your apps, videos, and other iTunes wares begin to download, you’ll be prompted for your Apple ID; remember to enter the Apple ID you use for the iTunes, which isn’t necessarily the same as your iCloud username and password.

11. So, you’ve waited patiently, and now all your apps and music are downloaded onto your iPad. But what about the non-iTunes videos and music sitting on iTunes? To transfer them (plus any photo albums) to your new iPad, just sync it with iTunes on your desktop. Still no music at all yet? Launch the iTunes app, click the Downloads tab at the bottom of the screen, and you should see all your media queued up for download.

12. At last, your new iPad is set up. What about your old iPad? Eventually, you’ll probably want to wipe it clean; until you’re sure your new iPad is set up properly, though, you may want to keep your old iPad as-is.

And, with any luck, that should just about do it.

Having trouble restoring the iCloud backup of your old iPad to your new one? If that’s the case, don’t panic; just describe what’s happening in the comments below, with screenshots if you can. I won’t be able to answer all your questions, but hopefully a fellow reader will.

Wednesday, December 21, 2011

What is the feature in iphone 5 to avoid the difficulties of the hardware buttons?


Apple has released the newest beta of their upcoming iOS 5 mobile operating system, and one of the quickly discovered new features is a gesture interface that provides the same functionality as the iPhone and iPad’s hardware buttons.


Listed under the Accessibility settings in the device’s setup area, the new “Assistive Touch” option places a floating button on the screen which allows users to use touch gestures to complete a variety of commands, including returning to the home screen, multitasking, changing the device’s volume and more. While it appears that Assistive Touch is targeted at those who have difficulty with hardware buttons, the feature appearing in this way has signaled to many that Apple is considering dropping hardware buttons in future devices.

There are some gaps in the Assistive Touch software, as would be expected from a beta release. It’s possible to create and save custom gestures for the interface, but as of yet there appears to be no way to actually assign it to do anything. The rest of the interface appears to be working perfectly, however, as users can make use of the Assistive Touch menu system to access four options: Home, Device, Gestures and Favorites.

The “Home” option does exactly what it sounds like, returning the user to the iPhone or iPad’s home screen – similar in function to the hardware button. “Device” offers a multitude of different controls, including those to lock the screen, to change the volume, a button that performs a “shake” of the device, and another to rotate the screen’s orientation. The “Gestures” menu shows options for three, four and five-fingered gestures, which have been popping up in the iPad 2 betas for iOS 5 and are expected to be coming to the device when iOS 5 is officially released. Finally, “Favorites” allows access to custom, saved gestures as well as a handful of other ones such as “pinch” and “swipe”.

Customers of Apple’s devices who may struggle with some or all of the hardware gestures – think elderly users and the “shake” function on an iPad – are likely to be very happy with the company’s implementation of these resources in iOS 5. While the rumor mill is likely to use Assistive Touch as Apple’s means to finally rid their devices of hardware buttons, there’s been no indication from the company that they ever plan to do so, and a great deal of users would be frustrated with the inability to adjust things like an iPhone’s volume without taking the device out of their pocket and accessing the screen. Assistive Touch does show that Apple is paying attention to its customer space, and that they have the skills to produce software interfaces that could eliminate hardware buttons in the future if that’s what the market dictates.

It’s tough to imagine a button-less iPod or iPhone, but this could be relatively feasible for the iPad which is screen-centric and virtually everything is done via the display. Only time will tell if Apple decides to eliminate hardware buttons entirely.


1. Multi Touch Gestures
iOS 4.3 GM came with a feature named multi touch gestures. The feature enabled users in using only 4-5 fingers to perform several tasks (i.e. a 5 finger pinch would take you to the home screen). So it is the first most expected feature from iPhone 5.

2. Lack of Home Button
Users think that there is no need of a hardware home button when one can switch between the apps with just a 4 finger pinch! But it is a major hardware change; so I don’t think that Apple will do it.

3. 1GHz Dual Core CPU
We know that iPad 2 already features an A5 chip, so we can expect it from our iPhone 5 also. An A5 chip is a chip with 1GHz ARM Cortex A8 ( may be A9 also). According to Jobs, the A5 chip is 2 times faster CPU and 9 times faster GPU.

4. 512 MB Ram
iPad 2 has got the 512 MB Ram. So users are also expecting the same in their iPhone. But the chances of this change are very rare.

5. Availability of iPhone 5 from the First day of its launch
Either it is a case of iPad or of iPhone, users always want the availability of the white device from the first day of its launch. So it is also a most demanded feature of iPhone 5.

Sunday, December 4, 2011

How To Disable/Hide Google Search Bar In Android 4.0 ICS Stock Launcher?

Among the many features and interface elements that Android 4.0 Ice Cream Sandwich took from the tablet-exclusive Android OS variant, Honeycomb, is the static search bar that it displays at the top of its stock launcher. Being static (accessible from each of the five homescreens of the stock launcher), it eliminates the need for you to make room for a search widget on the homescreen. That said, users who don’t use the search application that often might consider it dead weight doing nothing more than making their homescreen look all cluttered. XDA-Developers member oscillik has found a workaround that allows you to hide the search bar. Read on past the break to know how it’s done.


The method involves disabling the native Google Search application, so while it may hide the search bar from the homescreen, it will also prevent you from using Google Search itself. That is, hitting the Search key on your device while on the homescreen or within the app drawer won’t launch the search application.

Also, it doesn’t give you extra space on the homescreen. The space that the search bar takes remains unusable. Still, it does make your homescreen look a little less cluttered, and you won’t be losing much if you seldom use the search application. So without further adieu, here is what you need to do to remove the search bar from your homescreen:
Hit the Menu key while on the homescreen, and navigate to Manage Apps > All > Google Search.
From within the App info screen that follows, select Disable.

That’s all there is to it. You can get the search bar back at any time by returning to the Google Search App info screen and hitting Enable. You’ll find the Google Search application at the bottom of the list with all the other disabled apps (if any).

The method is quite simple, but if you do happen to get stuck somewhere, the following video might be able to clear things up for you.

Saturday, December 3, 2011

What are the features of Google+ Android App Updated version?

The official Google+ client for Android has received a timely update (to v1.0.7) with a plethora of useful features that would surely help it compete better with some of the other hot-running social apps among users (Facebook in particular). For starters, it adds support for the much anticipated group video chat feature better known as Hangouts. Also added to the updated client of Google+ for Android are some other sought-after features which we shall delve into after the break.


If you have an Android device with a front-facing camera and Android 2.3 or above, then the news of the addition of Hangouts to the Google+ client would surely delight you. For other users, it’s just a matter of time before this feature is available for their devices as well. We put the Hangouts feature to test on our Nexus S with quite satisfactory results. To our (rather pleasant) surprise, an active Hangout session keeps running in the background. To alert you of your active Hangout, the app displays a notification icon in the status bar.

Glancing at some of the other features included with the updated Google+ client for Android, we find that users can now set their profile pictures from within the app. Other noteworthy additions made to the updated client include sharing photos in Huddle (now known as Messenger), long pressing on posts in stream to +1, share and mute them and improved SMS support (for users in India only). In addition, the app brings enhanced public search and App2SD support along with extensive settings for your Google+ notifications.


To set a new profile photo, just tap on the Profile button, tap on the profile photo thumbnail, then pick one from the gallery or simply grab a fresh one instantly from your camera.

As mentioned earlier, Huddle is now called Messenger and allows you to share photos with your contacts. You will notice a camera icon besides the text message field on the conversation screen. Tap on this icon to pick an image from the gallery or capture a new photo. Tapping on a shared image displays it in full screen.


To enable/disable notifications for selective activities in your Google+ network, go to Menu > Settings > Notification Settings.

To install Google+ app on your device for the first time or to upgrade the existing installation, visit the Android Market link or simply scan the QR code provided below.

Google+ App For Android

Ever since the advent of social media (back in the age when Friendster and MySpace ruled) the social networking industry has enjoyed rapid growth. Most of the people reading this post must know that a Tweet doesn’t have much to do with the chirping of a bird and the word “Wall” is sure to make you think of Facebook. That’s the kind of influence social networking holds over our daily lives these days. Seeing the success of social networking, how can the giants of Internet refrain from entering the fray? Yes, you guessed it, Google is launching a new project called “Google+” that’s all about social interaction.


Let us delve into the features of this Android app one by one. The full app is actually a combination of collaborating utilities working together to give a complete interactive environment.

Stream: “Stream” is the place where you can share your thoughts, news and other things with the people you choose to interact with. You simply post anything here and it is shared with your contacts.

Huddle: “Huddle” lets you send messages to multiple users simultaneously. This is a pretty old facility but one that’s long been marred by bugs, flaws and inconveniences. Google+ is hopeful to give the perfect group messaging experience.

Circles: Privacy is the biggest downside when it comes to social networking. When online, it’s a little complicated to share the right information with the right people. “Circles” comes up with just the right solution to this problem. You can have distinct online social life among your family and colleagues or any other group. What you share with your friends doesn’t necessarily needs to be told to your family too!

Other features: There are a bundle of other really cool features that leave Google+ looking like a good prospect for the future. “Spark” helps you strike up a conversation on any topic of your choice. “Photos” saves and shares your photos and albums. There are also location-based services available for Android users that let you navigate, choose a place you want to visit and tag the locations which are new to you.

That’s pretty much it. The project is in closed beta phase and the app for your Android device is available on the Android market. Fingers tingling to get your hands on this latest hot-cake of an app? But wait, here’s the catch, the testing version is invite only and you need an invitation from Google to download it. Here’s the link where you can request an invite. So just write to Google and you just might get an exclusive invitation to use what could be the social networking giant of tomorrow.


For any further information on the app, you can follow the link to the official Google blog.

Sunday, October 30, 2011

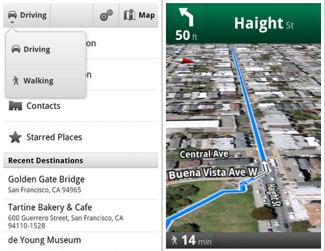
Get Navigation on Foot With Google Maps For Android Update

Google is making big moves lately, first with priority inbox and Instant search, then some new updates to its Android Voice app and the Google Earth website, and now Google Maps on Android is getting updated with a brand-new feature: walking navigation!

Find out what's coming with the latest update (and why you should care) after the jump.

Not just walking directions, the walking navigation feature gives you turn-by-turn directions as you find your way from point A to B on foot. Just choose "walking" from your Navigation icon, and your Android device will use the internal GPS to show you how to get there every step of the way. But don't worry about missing a turn if you're in a loud and bustling city — walking navigation will allow your Android device to vibrate every time you need to make a turn, so you never miss a voice command. Plus, the map will rotate with you as you change directions, along with using satellite by default, so you'll get (and keep) your bearings in a new place.


The Google Maps 4.5 update is available now for free in the Android Market!

Friday, October 28, 2011

How To Add Templates In Ubuntu Context Menu?


Each Ubuntu user has a Templates folder located in their Home directory. This folder is empty by default, and anything you put inside this folder is displayed in your right-click context menu (via Create New Document menu). This feature, hence, enables users to create custom templates for quickly creating new documents. For example, you can create and place a Libre Office template that may come in handy every now and then. This may be a company letterhead, a frequently used expense calculation sheet, and others of the like.
Create Document
There is, of course, another alternative for individually adding items to the right-click menu without much hassle, i.e., by using third-party templates. For your convenience, we have provided a download link to a third-party templates pack (the Ultimate Templates Pack). This pack contains a number of templates for creating new RAR, GZ, TXT, Python, PHP, GIMP Image, Open office and many other kinds of files. To use Ultimate Templates Pack, download the package from the link given at the end of this post, copy the folder to the Templates directory within the Home folder, and extract it. This will display the templates in Ubuntu right-click context menu.

In case you find many of the items within this package to be unwanted, simply delete the files for those applications from the Templates directory, such as, perhaps, development specific items for creating XML, Java or C++ documents.

Thursday, October 27, 2011

How to Store And Retrieve Files From Your Gmail Account With GMail Drive?


Google, or Gmail, specifically, offers its users over 7.5GB of storage space. For most of us, having this much storage capacity in our mailbox is useless, since emails are mostly in kilobytes. GMail Drive is a Shell Extension for Windows that creates a virtual file system around your Google Mail account. In addition to just being an email client, it allows you to use your Gmail account as a storage medium. Once installed, it creates a virtual drive inside Windows Explorer and enables you to create, copy and delete files and folders. When you upload a file to your Gmail account, the application will automatically generate an email with the file as an attachment. You can use GMail Drive to access and modify all the files uploaded from the application.
To begin with, install GMail Drive, and it will automatically create a virtual drive in your Windows Explorer. By default, the virtual drive is named “GMail Drive” and can be found under Computer in Windows Explorer.
Gmail Drive
When accessing the drive for the first time, you are required to log in with your Gmail account. CheckAuto Login to prevent the application from nagging you for credentials in future sessions.
GMail Drive Login
Once logged in, copying files and folders is just a matter of drag and drop. Drag the files you want to copy and drop them into the drive window. A pop up message will display the upload progress, and once it is complete, you will receive an email with the file as an attachment.

To avoid cluttering up your email, you can create a filter in your Gmail account to automatically move files with “GMAILFS” in their subject, to your archived mail folder. GMail Drive works on Windows XP, Windows Vista and Windows 7.

Wednesday, October 26, 2011

Top Features of iPhone 4S and recent Images

iPhone 4S Pictures and Features


Today's Apple "Let's Talk iPhone" event at the company's Cupertino headquarters brought the introduction of the latest iPhone — the iPhone 4S. Though it's not the completely overhauled iPhone 5 many people were hoping for, the technology inside the iPhone 4S has received a dramatic revamp that includes the same dual-core A5 processor chip of the iPad 2; iOS 5 software; a faster 8MP camera; a 1080p HD resolution video camera; an updated antenna that works on both the GSM and CDMA networks for worldwide use; a 64GB capacity option; improved battery life for eight hours of 3G talk time; and, most noteworthy, Siri, an intelligent assistant operated by voice controls. We can expect deep Twitter integration in the iPhone 4S, as well as a Notifications center, new iMessage app, and Reminders app within the device.
The iPhone 4S comes in both black and white at a suggested retail price of $199 for the 16GB model, $299 for the 32GB model, and $399 for the 64GB model. Available for pre-order on Oct. 7, the iPhone 4S will hit US stores on Oct. 14 on three carriers: Verizon, AT&T, and Sprint.

Top 6 Cool Features Coming With Android 4.0 Ice Cream Sandwich


Android 4.0, codename Ice Cream Sandwich, is set to be rolled out to Android lovers everywhere this November with the launch of the Galaxy Nexus phone, and all signs indicate that this is the best OS yet. The entire system has been revamped and refined, bringing some powerful apps, features, and functionality to the mix. Though there are plenty of new tidbits to learn about inside Android 4.0 (which we'll be uncovering over the next few weeks prior to its release), here are six cool features we can't wait to try out.


  • Face Unlock — Say buh-bye to passcodes! Thanks to some upgraded face detection software, Ice Cream Sandwich can take a quick scan of your face to unlock your device. The only downside might be low-light situations, but hopefully there's a way to bypass face detection for a code in those instances.
  • Android Beam — NFC technology takes another turn with Android Beam, which will allow you to share information and content — like contacts, websites, apps, maps, and more — with other Android users within close proximity.
  • Flexible widgets — Organize your homescreen the way you want it with flexible widgets. You can scale Android's stock widgets up or down in size and store them in a separate space of their own in the app drawer.
  • Voice typing — This feature allows you to speak your emails, texts, messages, and search queries (or anywhere you want to enter text) just by tapping on the microphone icon on your keyboard.
  • Panoramic camera modes — Your on-board camera can take full panoramic pics with Ice Cream Sandwich and full panorama mode. Partner this with the new zero-lag shutter on the Galaxy Nexus and you have a sweet way to document landscapes.
  • New typeface — Hey, lookie here: Android has a new typeface! Gone are the days of Droid Sans — Roboto is on the scene now.
Want to see more? Check out the Ice Cream Sandwich and Galaxy Nexus demo video after the break.

Tuesday, October 25, 2011

How to Install Android 2.3 Gingerbread On Samsung Spica i5700?


Gingerbread Samsung Spica i5700 Samsung Spica i5700 Gingerbread
Most of the Android 2.3 Gingerbread ROMs that we have been featuring here recently have been for HTC, Motorola and Samsung Galaxy S Series devices as these models get most of the independent development community’s attention, but now we are bringing you a latest Android 2.3 Gingerbread based custom ROM for the Samsung Spica i5700.
Disclaimer: Please follow this guide at your own risk. AddictiveTips will not be liable if your device gets damaged or bricked during the process.
WARNING: This ROM is a test build and is not stable enough for daily use.
Brought to you by Samdroid forum member LeshaK, this ROM is just a test build and is quite unstable at the moment. However, the Gingerbread interface is fully functional. Audio, voice, data and SD card are working but may still have stability issues. GPS, camera, Wi-Fi and sensors are not working.
To install this ROM, download it from the link given below, copy it to the root of your SD card and flash it to your device from recovery after wiping data and cache. For detailed installation instructions, refer to our guide on how to install a ROM to your Android device from recovery.
The developer needs user response to make this ROM better. Therefore to report bugs, request features or get updates on the development progress, head over to this Samdroid Forum thread.